
Quickstart
Create your first Hub, choose a model provider, start the chat app, have a first conversation with your agent and open the Console.
This page takes you from an installed package to a running agent on http://localhost:3080. It assumes you have installed Hubzoid in a Python 3.11 or 3.12 virtual environment.
Create a Hub
hubzoid init my-hubhubzoid init creates my-hub/ under the current folder from a bundled template and writes three things:
- The Hub files:
AGENTS.mdplus one worked example inagents/,skills/,knowledge/,tools_local/,connectors/,schedule/,evals/,raw_data/andbranding/. - A
.envfile withMODEL=claude-local, commented stanzas for OpenRouter, OpenAI and Anthropic, and a randomBRIDGE_API_KEYSvalue. The file is created with mode0600because it holds a live key. - When the parent folder is empty or holds only a README,
requirements.txt, a license file or dotfiles, a small agents repository wrapper:requirements.txtpinned to your installed Hubzoid version,.gitignoreandREADME.md. Runhubzoid initagain in the same folder to add more Hubs beside the first one. Parent files are written only once.
| Option | Default | Effect |
|---|---|---|
NAME | demo-hub | Folder to create. . scaffolds into the current folder. |
--template, -t | minimal | minimal, demo or watchtower. See templates. |
--force | off | Overwrite existing files in the Hub folder. Files in the parent folder are never overwritten. |
Without --force, existing files are skipped and the command reports how many.
Choose a model
The model is set by MODEL in my-hub/.env. The default, claude-local, needs no API key: Hubzoid runs the Claude Agent SDK against your installed claude CLI, and a logged-in CLI draws on your Claude Pro or Max subscription.
MODEL=claude-local              # Sonnet
# MODEL=claude-local/opus       # Opus
# MODEL=claude-local/haiku      # Haiku, lower latency
claude-local authenticates in one of three ways:
| Method | Setting |
|---|---|
| Interactive login on this machine | Run claude login once, so the claude CLI is logged in. |
| Headless server | CLAUDE_CODE_OAUTH_TOKEN in .env, a subscription token printed by claude setup-token on any logged-in machine. |
| Anthropic API key | ANTHROPIC_API_KEY in .env. |
If the Codex CLI is signed in instead, use codex-local, which runs the Hub on local Codex. It needs Codex CLI 0.147.0, signed in with file-backed credentials (codex -c 'cli_auth_credentials_store="file"' login) as the account that runs Hubzoid, on macOS or Linux. In an interactive terminal, hubzoid init picks whichever CLI is signed in and asks once when both are.
MODEL=codex-local
# MODEL=codex-local/<model-id>  # optional model pin
To use a hosted provider instead, comment out the local model, set MODEL to a LiteLLM model id and add the matching key:
| Provider | MODEL example | Key |
|---|---|---|
| OpenRouter | openrouter/anthropic/claude-haiku-4.5 | OPENROUTER_API_KEY |
| OpenAI | openai/gpt-4o-mini | OPENAI_API_KEY |
| Anthropic | anthropic/claude-haiku-4-5 | ANTHROPIC_API_KEY |
| Azure OpenAI | azure/<deployment-name> | AZURE_API_KEY and AZURE_API_BASE, optionally AZURE_API_VERSION |
# MODEL=claude-local
OPENROUTER_API_KEY=sk-or-v1-...
MODEL=openrouter/anthropic/claude-haiku-4.5
MODEL in .env wins over a model: line in AGENTS.md. With neither set, the Hub uses claude-local. If the key for the chosen provider is missing, the agent does not build and the error names the variable to add. Agents and models covers per-agent models and runtime settings.
Run the Hub
hubzoid run my-hubhubzoid run starts three processes: the bridge on 127.0.0.1:8000, the Open WebUI chat app on a loopback port, and the edge router on port 3080, which is the one address you open. When the webui line in the terminal says ready, open http://localhost:3080.
| Option | Default | Effect |
|---|---|---|
--port | 3080 (or PORT) | Public port for the chat app, downloads, the Console and MCP. |
--bridge-port | 8000 (or BRIDGE_PORT) | Bridge port. Always bound to 127.0.0.1. |
--host | 127.0.0.1 (or HUBZOID_HOST) | Interface for the public port. 0.0.0.0 exposes it on your network. |
--no-ui | off | Start the bridge only. |
--slack, --whatsapp, --telegram, --webhook | off | Start those surfaces in the same run when their variables are set. |
Stop everything with Ctrl+C. Most changes to Hub files take effect the next time you start it. Knowledge files are read live, each time the agent calls read_knowledge.
Have your first conversation
The chat opens without a sign-in page, because sign-in is off by default for local use. The model picker shows your Hub's agent, and the empty chat offers the prompts from the suggestions: list in AGENTS.md:
- What is in this hub?
- Greet me with the hello skill
- List my skills and knowledge
The hello prompt shows the full path through a Hub: the agent loads the hello skill from skills/hello.md, which tells it to call the hello tool defined in tools_local/hello.py. Each tool call appears in the answer as a collapsible entry.
You can send a prompt from the terminal too. hubzoid test builds the agent in-process, without the bridge or the chat app:
hubzoid test my-hub --prompt "What is in this hub?"Now make the Hub yours. Replace the body of my-hub/AGENTS.md with the agent's real job, put reference material in knowledge/, and restart hubzoid run.
Check the Hub
hubzoid doctor my-hubOn a fresh local Hub, expect passing checks for the files, the agent build and the bridge key, an information line saying chat sign-in is off (fine for local use only), and a warning that no backup has been recorded yet. Fix anything marked as failed. The command exits with code 1 while any check fails. See the doctor reference.
Open the Console
The Console is served on the same port, at http://localhost:3080/portal/. With sign-in off, the chat app has one account, admin@localhost, and Hubzoid makes it the Hub's owner the first time you open the chat or the Console: an administrator in the Console with Use this agent in the Hub. A Hub created with hubzoid init uses managed access from the start, so there is nothing to set up. Open /portal/ directly, or select Admin Console above your profile in the chat sidebar. There is no second password.
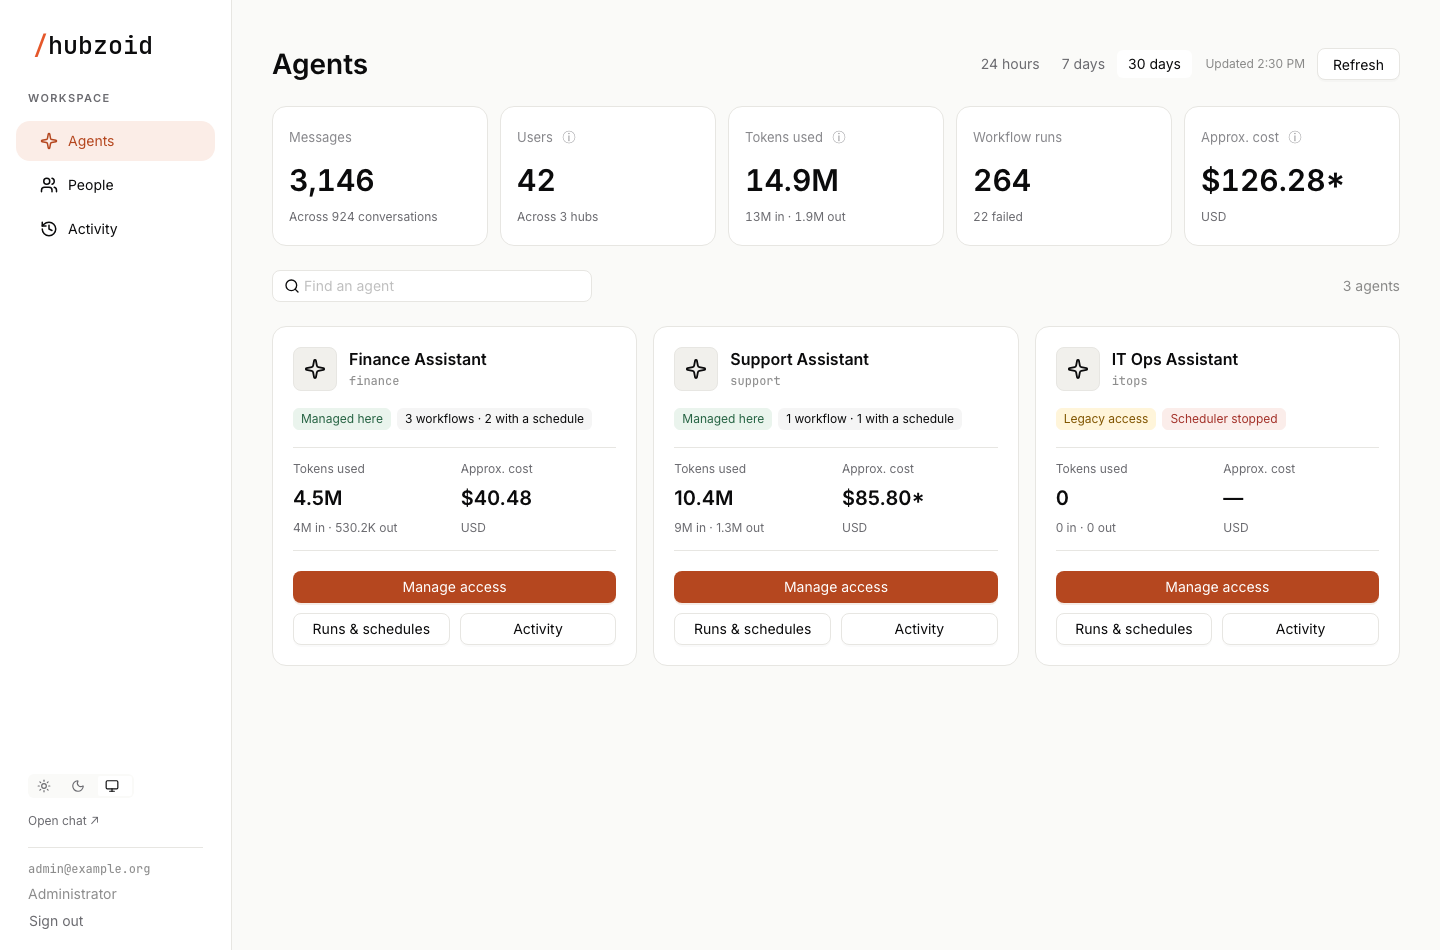
The Console opens on Agents: usage totals for the chosen period above one card per agent. Each agent holds its access, its runs and schedules, and its activity. People lists accounts with their role and access, and Activity shows access changes and tool decisions. A new Hub starts with empty usage and run history, so send a chat first. The Console overview explains each screen.
Teammates need their own accounts, which means turning sign-in on and giving the Console the chat app's service account in HUBZOID_GATEWAY_ADMIN_EMAIL and HUBZOID_GATEWAY_ADMIN_PASSWORD. You then add them with Add user and share their sign-in details yourself. Authentication covers the sign-in options, and access administration explains how Hubzoid manages who can use each agent.
Sign-in before sharing
With sign-in off, anyone who can reach the port can use the Hub, and open its Console as the administrator, without a login. Keep --host at 127.0.0.1 until sign-in is on.